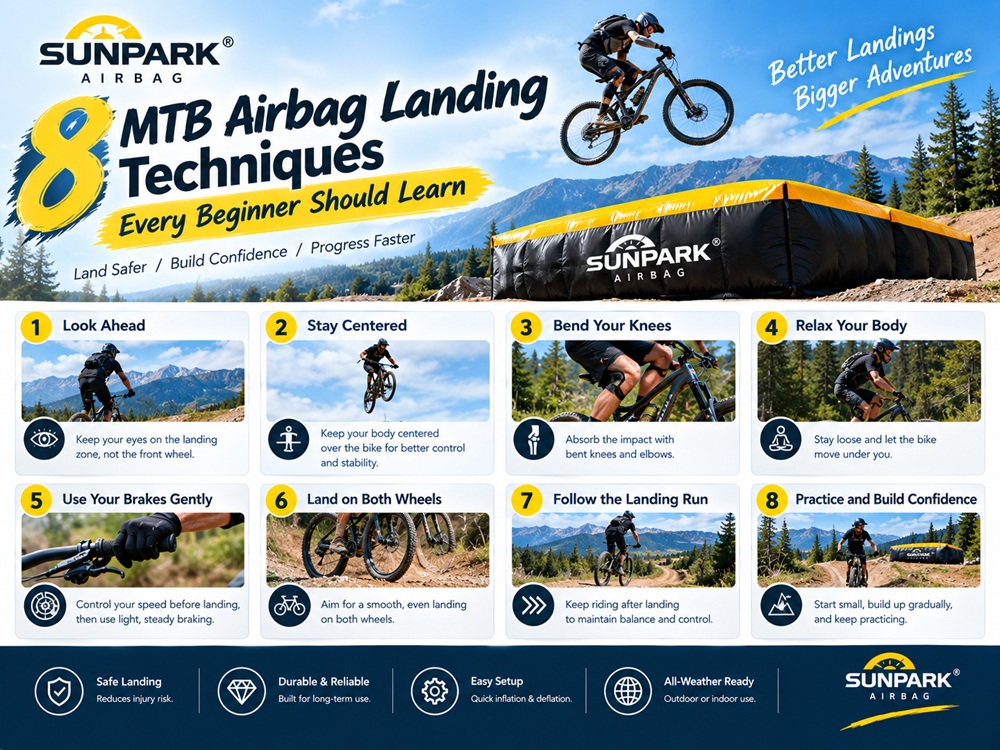
Quick Answer: What Are the Core MTB Airbag Landing Techniques?
Mastering MTB airbag landing techniques relies on understanding the difference between a “ride-out” and a “bail.” The 8 non-negotiable techniques are: (1) The Speed Check Calibration (testing rolling speed without jumping to memorize the ramp trajectory); (2) The Active Lip Pop (pumping the takeoff to maintain a stable flight path rather than “dead-sailing”); (3) The Lateral Bike Separation (pushing the bike away horizontally during a failed trick to avoid landing on the frame); (4) The Rear-Wheel Touchdown (landing slightly back-heavy on sloped transition bags to ride out smoothly); (5) The Tuck-and-Roll Impact (tucking the chin and absorbing impact across the upper back on flat stunt bags); (6) Firming Up Suspension (increasing compression damping so your fork doesn’t swallow your takeoff energy); (7) The Flat Pedal Mandate (never using clipless pedals, allowing instant bail capabilities); and (8) The 5-Second Evacuation Rule (clearing the landing zone immediately to prevent catastrophic collisions with trailing riders). To execute these safely, riders require a genuine sloped transition pad like the Sunparkairbag MTB Airbag Landing, which mimics dirt geometry while providing pneumatic deceleration.
What It Is & How It Works: The Physics of Pneumatic Deceleration
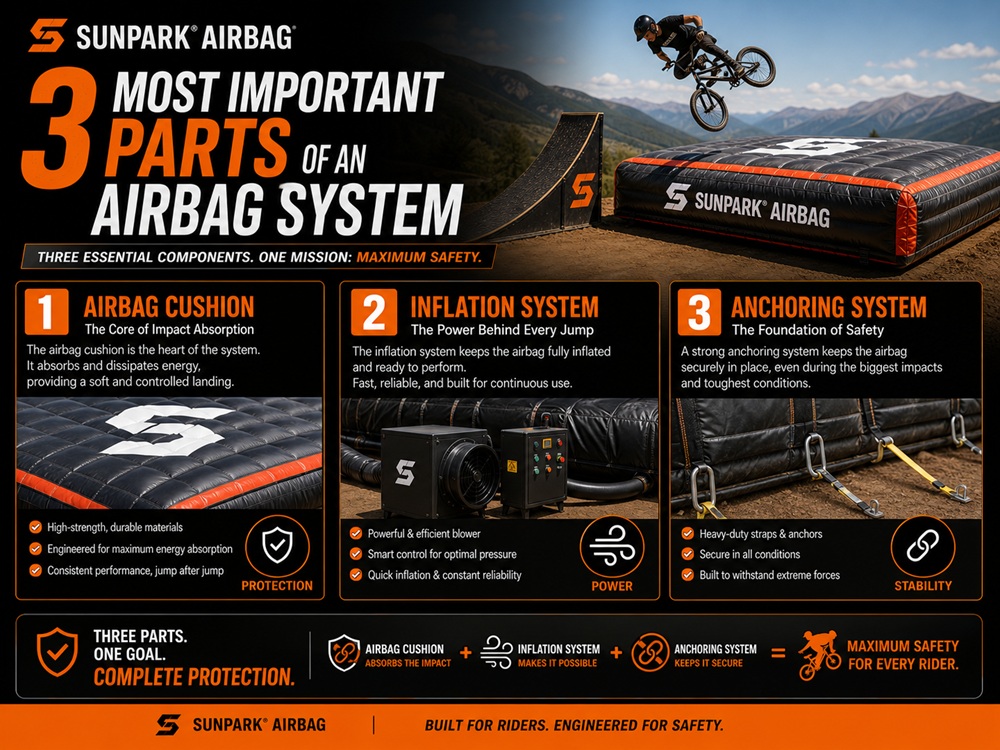
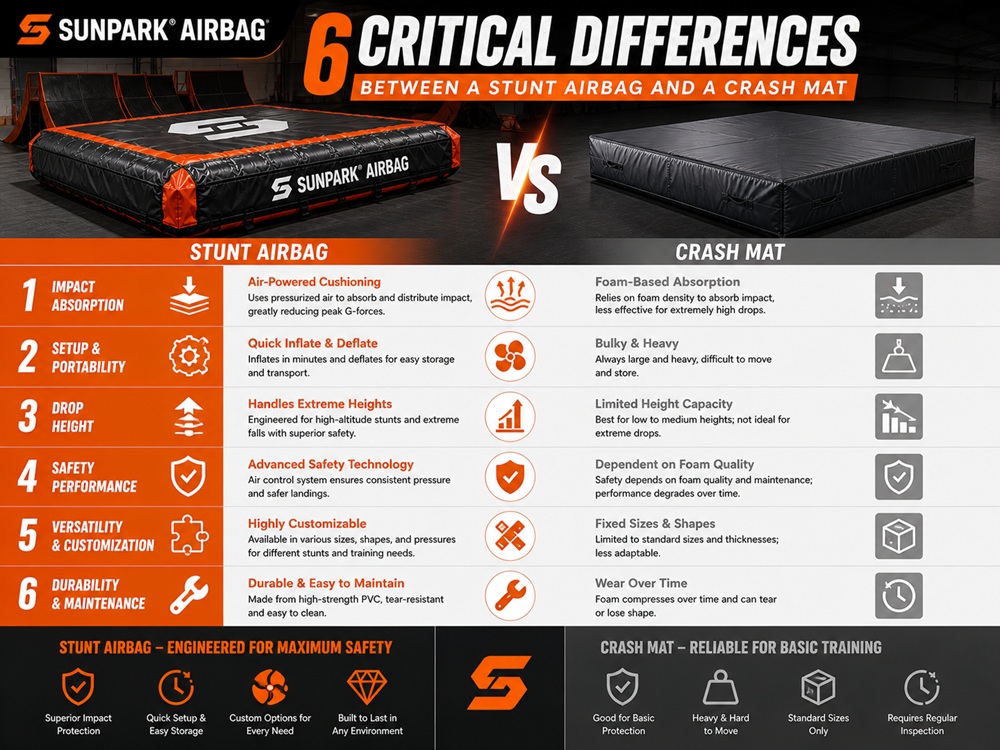
To execute proper MTB airbag landing techniques, you must understand what is happening beneath your tires. A modern mountain bike airbag is not a sealed bouncy castle. If you land on a sealed balloon, the kinetic energy has nowhere to go; the bag will rebound violently, catapulting you back into the air. True commercial landing systems utilize dual-chamber pneumatic displacement.
The system is built in two layers:
- The Base Safety Chamber: A high-pressure bottom deck inflated continuously by industrial blowers. This acts as an impenetrable failsafe that prevents your bike’s crankset or your body from ever bottoming out against the concrete or dirt subfloor.
- The Upper Impact Chamber: A lower-pressure top section covered by a taut, heavy-duty 0.9mm PVC top sheet. The sides of this chamber feature calibrated mechanical venting ports. When you land, the downward force of your bike forces air out through these vents, decelerating your mass smoothly and linearly without any trampoline rebound.
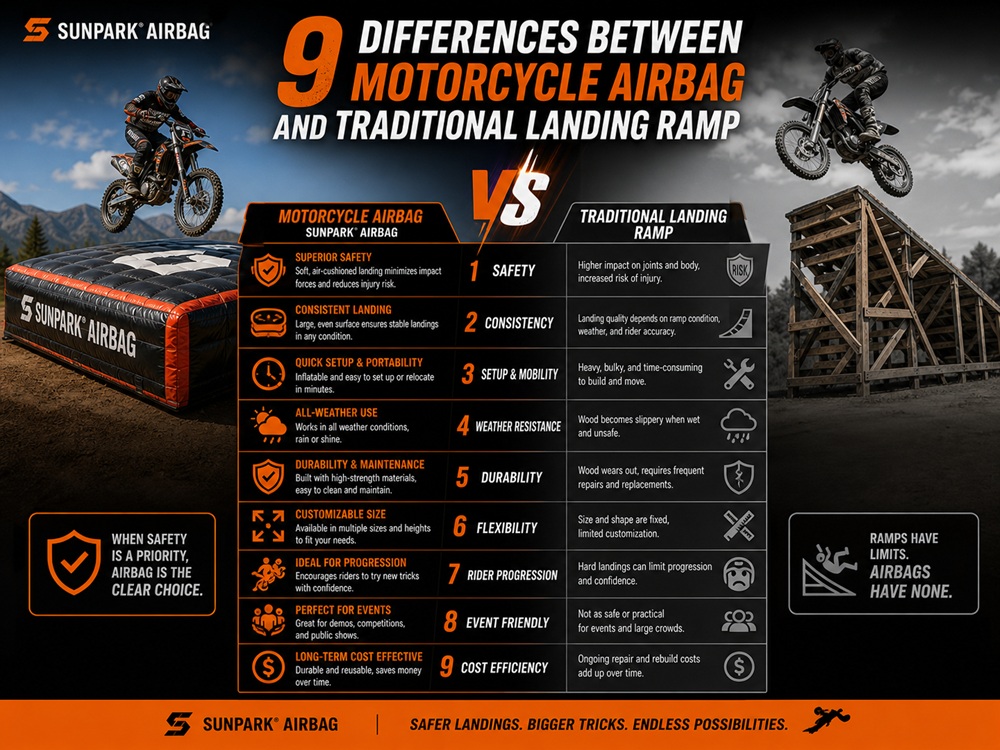
For mountain biking specifically, the industry has evolved from flat, square stunt airbag landing pads to sloped, transition-style bike airbag landing systems. A transition bag mimics the exact downward slope of a dirt landing. Because the top sheet remains firm under tension, if you land with your tires aligned to the slope, you will literally ride down the bag and roll onto the grass. Understanding this interaction—that the bag expects to be ridden, not just fallen upon—is the foundation of modern progression.
Quick Summary Table: The 8 Essential Landing Techniques
| Landing Technique | Execution Focus | Primary Safety Purpose | Applicable Airbag Type |
|---|---|---|---|
| 1. The Speed Check | Rolling beside the ramp to gauge speed | Prevents over-shooting the bag’s sweet spot | All Ramps & Bags |
| 2. Active Lip Pop | Pumping the suspension off the takeoff lip | Prevents “dead-sailing” and nose-diving | Transition & Flat Bags |
| 3. Lateral Separation | Pushing the bike horizontally away during a bail | Prevents landing on top of the metal bike frame | All Ramps & Bags |
| 4. Transition Ride-Out | Landing rear-wheel first on the downslope | Translates directly to landing on real dirt | Sloped Transition Bags |
| 5. Tuck-and-Roll Impact | Tucking the chin to the chest; landing on the back | Prevents whiplash and broken wrists on flat drops | Flat inflatable crash mat |
| 6. Stiffening Suspension | Locking out fork compression & slowing rebound | Prevents the bike from absorbing the ramp’s kick | All Ramps & Bags |
| 7. Flat Pedal Mandate | Riding with flat pedals and skate shoes (no clips) | Allows instant mid-air ejection during mistakes | All Ramps & Bags |
| 8. 5-Second Evacuation | Rolling off the side of the bag immediately | Prevents catastrophic collisions from the next rider | All Ramps & Bags |
In-Depth Guide: 8 MTB Airbag Landing Techniques Every Beginner Should Learn
1. The Speed Check and Ramp Calibration
The most dangerous thing a beginner can do is pedal aggressively at a jump they have never hit. An airbag has a specific “sweet spot”—a target landing zone located just past the knuckle of the transition. If you go too slow, you case the knuckle; if you over-clear the bag, you land on flat dirt.
The mandatory first technique is the speed check. Ride alongside the ramp (or roll up the transition and brake at the top) at the exact speed you intend to jump. Watch another rider of similar weight clear the jump, and pedal next to them to match their velocity. Your goal is to encode the approach speed into your muscle memory before your tires ever leave the ground.
2. The Active Takeoff (Never “Dead-Sail”)
A common psychological response to fear is freezing. Beginners often ride up the wooden kicker and simply hold on tight, allowing the ramp to throw them into the air passively. This is called “dead-sailing.” Because modern kickers have a steep, curved transition, dead-sailing forces the rear wheel to kick up higher than the front wheel, pitching the rider into a terrifying nose-dive.
To execute safe MTB airbag landing techniques, you must pop actively off the lip. Compress your suspension into the bottom of the ramp transition, and as your front wheel nears the top edge, stand up and pull the bars toward your hips. This active pump neutralizes the kick of the rear wheel, keeping the bike level and placing you in command of your trajectory.
3. The Controlled Bail (Lateral Separation)
You are going to mess up a trick; that is why you are on an airbag. However, landing on an airbag with a 30-pound aluminum or carbon fiber mountain bike sandwiched between your ribcage and the PVC top sheet will break your ribs. You must master the art of mid-air separation.
If a backflip under-rotates or a 360 goes off-axis, your immediate priority is to push the bike away from your body. Do not push the bike straight down; push it laterally to the left or right. By tossing the bike sideways, you ensure that your body lands on a soft pocket of air, while the bike lands on an adjacent section of the bag, eliminating the risk of blunt-force trauma from your own handlebars and pedals.
4. The Transition Ride-Out (Rear-Wheel Touchdown)
If you are training on a modern sloped mountain bike airbag landing guide setup, the goal is not to crash; the goal is to ride out. Landing a transition bag requires the exact same physics as landing a dirt jump.
In the air, spot your landing on the sloped downslope. Push the front of the bike down slightly to match the angle of the bag, but aim to let your rear tire make contact a fraction of a second before the front tire. Keep your arms and legs bent but firm. Because the 0.9mm PVC top sheet is taut, your tires will grip the surface, compress the upper air chamber, and allow you to roll down the slope smoothly. Never land stiff-armed or front-wheel heavy; if the front wheel digs in, the bike will stop instantly, throwing you over the bars.
5. The Tuck-and-Roll Impact (For Flat Bags)
If you are practicing big drops onto a flat big jump airbag system without a sloped transition, you cannot ride out. You must absorb the vertical impact safely.
When bailing onto a flat bag, never stick your arms out straight to brace your fall; this is the primary cause of fractured scaphoids and broken wrists. Instead, ditch the bike, cross your arms over your chest, and tuck your chin tight against your sternum. Aim to land flat on your upper back or shoulder blades. Tucking the chin prevents your head from whipping backward (whiplash) when your torso decelerates against the pneumatic surface.
6. Stiffening Your Suspension (Ramp Setup)
Mountain bike suspension is designed to absorb rocks and roots, but on a smooth wooden ramp, plush suspension is your enemy. If your fork and rear shock are set to a soft trail-riding pressure, they will absorb all of the kinetic energy as you ride up the ramp lip. The suspension will then rebound unpredictably as you leave the lip, throwing you off-axis.
Before hitting the airbag, add 15 to 20 PSI to your fork and rear shock, and slow down your rebound damping by a few clicks. You want the bike to feel stiff and responsive, ensuring that the energy you put into pumping the lip translates directly into vertical amplitude, giving you more hang-time to execute your trick safely.
7. The Flat Pedal Mandate (No Clipless Pedals)
In downhill racing and cross-country riding, being mechanically clipped into your pedals improves power transfer. On an airbag, being clipped in is a severe hazard.
If you attempt a trick and need to eject mid-air (see Technique #3), clipless pedals require a specific heel-twist motion to release. In a panic scenario, your brain will not execute that twist. You will land attached to the bike, risking severe ankle and knee torsion injuries. Always switch to wide, metal-pinned flat pedals paired with flat-soled skate/bike shoes when training on an airbag. This guarantees instant separation the moment you release foot pressure.
8. The 5-Second Evacuation Rule
Safety does not end when you touch the bag. In commercial facilities operating a inflatable jump airbag or at busy local jump spots, there is a line of riders waiting to drop in. The most catastrophic injuries in extreme sports occur when a rider lands safely, sits on the bag to celebrate, and gets crushed by a 200-pound rider landing on them five seconds later.
The moment you land—whether you ride out or crash—you must evacuate the landing zone immediately. Grab your bike and roll, slide, or scramble off the side of the bag in under five seconds. Never walk up the face of the landing, and never cross the runway to retrieve a dropped helmet. Clear the zone, then give the “all clear” thumbs-up to the starter at the top of the ramp.
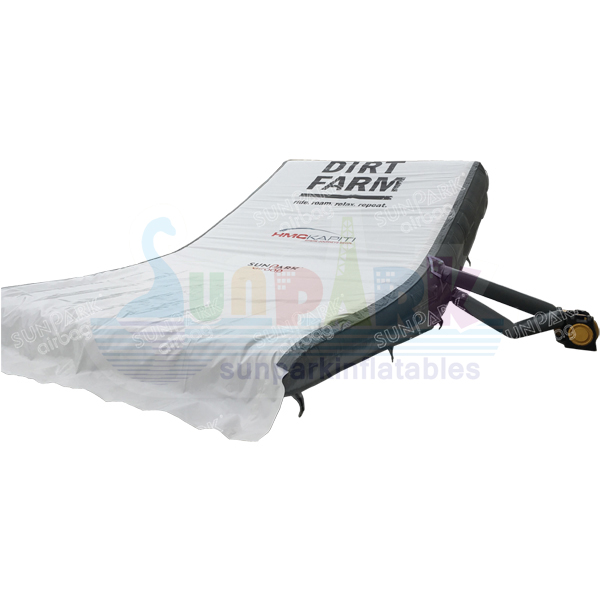
Hardware Spotlight: Sunparkairbag Mountain Bike Airbag Landing
To safely execute advanced progression techniques, riders require an engineered pneumatic platform that replicates true dirt transitions. The Sunparkairbag MTB Airbag Landing utilizes advanced dual-chamber technology and heavy-duty marine-grade PVC to deliver a firm, ride-out capable landing surface that eliminates bottoming-out risks.
| Airbag Architecture | Dual-Chamber Pneumatic System (Firm lower safety deck + vented upper deceleration chamber) |
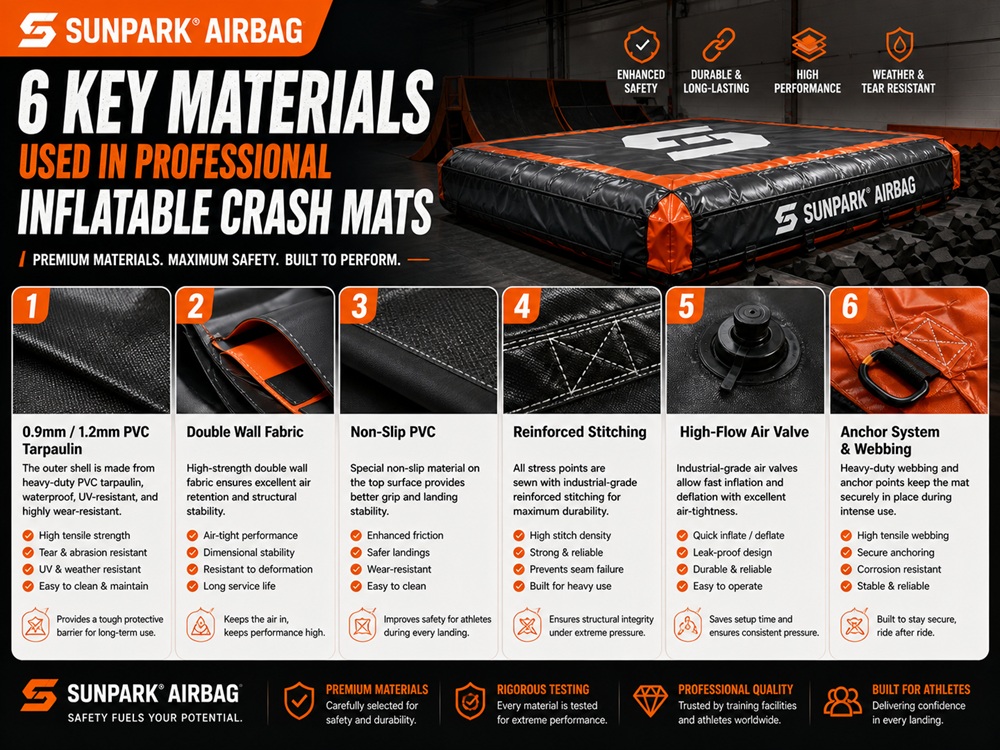
| Surface Materials | 0.9mm Heavy-Duty PVC Tarpaulin Top Sheet (Waterproof, flame-retardant, UV-protected, lead-free) |
| Base Materials | 0.55mm PVC Tarpaulin base construction with high-frequency welded seams |
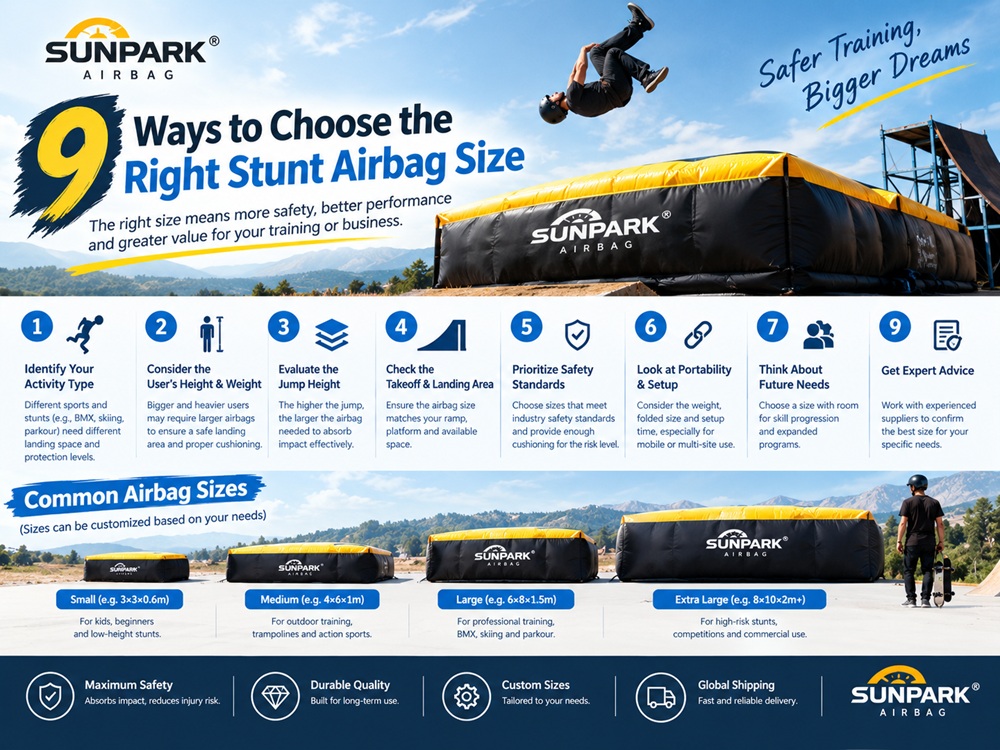
| Standard Dimensions | 8.5 × 4.5 × 1m (Custom sizes tailored to exact ramp trajectories available upon request) |
| Turnkey Package | Includes industrial continuous air blower, repair kit, and heavy-duty PVC carrying transport bag |
| Customization Options | Full digital, silk-screen, or UV logo printing for commercial bike parks and sponsor branding |
Facility Director’s Advice: Upgrade your progression zone from dangerous foam pits to high-throughput pneumatic landings. Inspect full technical CAD dimensions and order customized layouts at the official Mountain Bike Airbag portal, or evaluate commercial return-on-investment metrics in our trampoline park owner income guide.
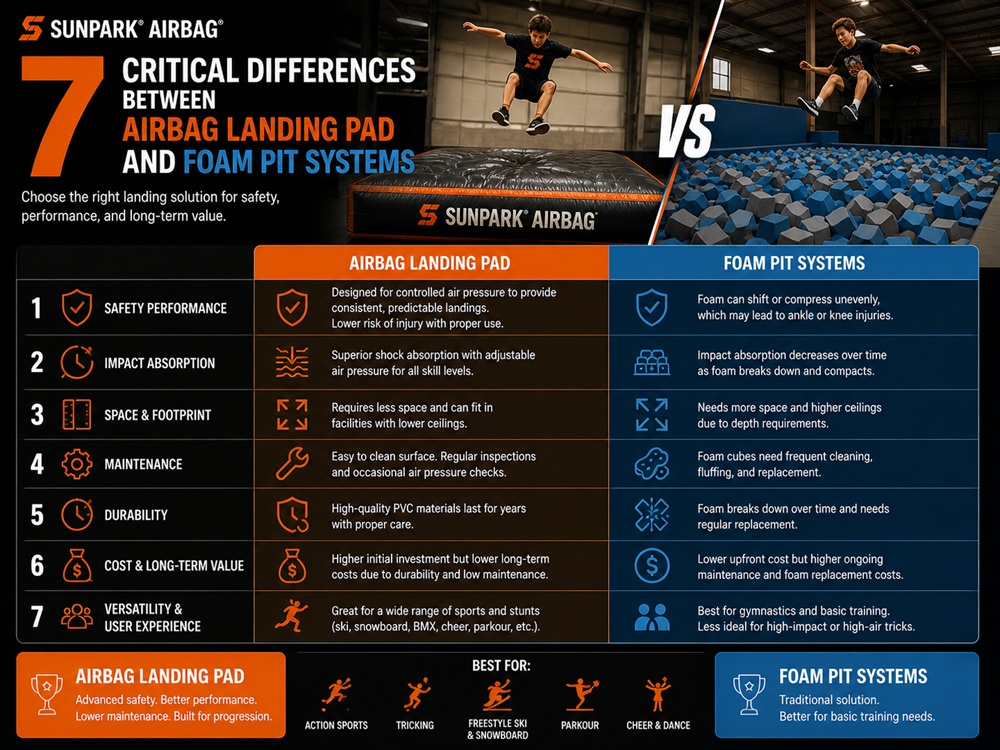
Direct Technical Comparison: Sloped Airbags vs. Flat Bags vs. Foam Pits
| Training Environment | Primary Design Mechanism | Ride-Away Capability | Injury Risk Profile | Throughput / Exit Time |
|---|---|---|---|---|
| Sloped Transition Airbag (e.g., Sunparkairbag MTB Lander) |
Dual-chamber venting with taut sloped top sheet | Yes (Mimics dirt landings) | Low (Allows safe roll-offs and bails) | Fast (3–5 seconds to clear) |
| Flat Stunt Airbag | Massive flat pneumatic shock absorption | No (Bail-only operations) | Low (Excellent vertical deceleration) | Fast (5–10 seconds to slide off) |
| Traditional Foam Pit | Static polyurethane cube compression | No (Bike sinks and wedges) | High (Rider tangles with bike frame) | Slow (45–90 seconds to crawl out) |
Pros and Cons: Training on Airbags vs. Dirt Jumps
| Progression Method | Documented Practical Advantages (Pros) | Real-World Operational Liabilities (Cons) |
|---|---|---|
| Airbag Landing Systems (Pneumatic Training) |
|
|
| Traditional Dirt Landings (Bark/Mulch or Hardpack) |
|
|
Commercial Benefits and Limitations of Airbag Facilities
For commercial bike parks, gymnastics centers, and action sports academies, investing in pneumatic landing infrastructure transforms facility economics. However, operators must balance throughput benefits with maintenance realities.
The Commercial Benefits for Park Operators
- Exponential Throughput Increase: A traditional foam pit limits a jump lane to one rider every 45 to 60 seconds as athletes struggle to extract their bikes from loose blocks. An airbag allows riders to roll off instantly, processing up to 10 to 12 riders per minute. This eliminates queue lines and maximizes customer satisfaction. For detailed financial modeling, review our breakdown of trampoline park construction cost.
- Elimination of Hygiene & Dust Hazards: Foam pits absorb sweat and break down into toxic, carcinogenic polyurethane micro-dust that coats the facility. Airbags feature antimicrobial 0.9mm PVC top sheets that can be sanitized with hospital-grade disinfectant wipes in ten minutes at the end of the day. Check out our diverse gym airbag for training options for clean indoor setups.
- Insurance Premium Reductions: Underwriters are increasingly hostile toward foam pits due to bottoming-out claims and fire hazards. Certified dual-chamber airbags demonstrate active risk mitigation, frequently qualifying facilities for liability premium reductions.
The Operational Limitations
- Continuous Power Dependency: An airbag is entirely reliant on the continuous operation of its industrial blowers. If a facility experiences a sudden power blackout, the bag will deflate rapidly. Operators must ensure redundant generator power or strict “no-jump” klaxon protocols during power dips.
- Sharp Object Vulnerability: While 0.9mm PVC is remarkably durable, mountain bikes feature sharp metal pedal pins and occasionally exposed handlebar ends. Facility operators must mandate the use of plastic pedals or protective bar-end caps, and strictly prohibit riders from wearing spiked cleats or sharp jewelry on the bag.
Who Should Use an Airbag vs. Who Does Not Need One
Every dollar spent on action sports infrastructure should align with the athlete’s progression level and facility goals. Discerning when an airbag is mandatory versus when it is a luxury prevents wasted capital.
Who Must Train with an Airbag System:
- Amateur Riders Learning Inversions (Flips and Spins): If you are attempting your first backflip, 360, or tailwhip, taking it straight to dirt is reckless. An airbag is the only safe environment to develop spatial awareness while upside down. For those seeking training spots, consult our airbag jump locations guide.
- Commercial Bike Parks & Action Sports Camps: Any business charging customers for progression clinics must provide a sloped airbag. It is the defining attraction that drives ticket sales and keeps campers safe from season-ending injuries.
- FMX (Freestyle Motocross) and Heavy Vehicle Athletes: A 250lb dirt bike cannot safely jump into a foam pit without destroying the bike and the pit. Specialized, ultra-heavy-duty transition airbags are the only viable training method for motorized athletes.
Who Does Not Need an Airbag:
- Cross-Country (XC) Racers & Trail Riders: If your primary focus is pedaling efficiency, rock gardens, and keeping your wheels on the ground, investing in an airbag or spending days at an airbag park will not significantly improve your trail times.
- Riders Practicing Basic Bunny Hops or Small Drops: If you are simply learning how to clear a 3-foot tabletop or jump a small curb, an airbag is overkill. Master the fundamental mechanics of jumping on small, forgiving dirt tabletops before moving to massive kicker ramps.
5 Costly Mistakes Beginners Make on Airbags
Safety Inspector Advisory: The “Dead-Stick” Front Wheel Landing
The most catastrophic mistake beginners make on a sloped transition airbag is landing with the front wheel pointed straight down while their arms are locked stiff. Because the PVC top sheet has high grip friction, if the front wheel hits the bag at a steep angle, it will not roll—it will bite instantly into the material. The bike will stop dead at 20 mph, and physics will catapult the rider violently over the handlebars, resulting in separated AC joints or clavicle fractures. Always land rear-wheel first or level, keeping your elbows bent to absorb the transition.
- Buying Used Bags Without Inspecting Baffles: Private riders often try to save money by purchasing a 5-year-old retired commercial bag. Over years of UV exposure and thousands of impacts, the internal I-beam baffles that hold the bag’s shape can rip. If an internal baffle is torn, the bag will bulge unpredictably and lose its safe deceleration profile. Always follow strict auditing protocols, such as our buy used airbag landing tips, before purchasing second-hand.
- Jumping Without Spotters or Traffic Control: At local backyard setups, riders get excited and drop in one after another. If the rider ahead of you crashes and is struggling to drag their bike off the bag, and you drop in blind, a mid-air collision is inevitable. Always assign a dedicated starter at the top of the ramp who waits for an “all-clear” thumbs-up from the landing zone.
- Over-Inflating the Bag for a “Firmer” Ride: Some operators tape over the pressure-release vents to make the bag harder, thinking it will make riding away easier. Over-inflating the upper chamber removes the bag’s ability to displace air. When you land, the bag acts like a tight trampoline, bouncing you violently back into the air and snapping you sideways. The bag *must* be allowed to vent air upon impact.
- Practicing on Wet PVC: If it starts to rain, or if morning dew has settled on the airbag, stop jumping immediately. Wet PVC tarpaulin is as slick as black ice. If your tires touch down slightly off-center on a wet bag, they will slide out instantly, slamming your hip and shoulder directly into the surface.
- Bringing the Wrong Bike: Using a cross-country bike with a high seat post and steep head angle on a steep dirt-jump kicker is dangerous. The seat will buck you over the bars. Always drop your saddle as low as possible and use a dirt jumper, BMX, or slopestyle bike designed for aerial stability.
Essential Sourcing Checklist: Auditing a Bike Park’s Airbag Setup
Before you commit to a day of training at a commercial park, or before a facility manager issues a purchase order for gymnastics airbag equipment or MTB setups, verify compliance across these four critical engineering benchmarks:
1. Verified Dual-Chamber Architecture
Never ride a bag that features a single internal air chamber. If you land heavy, the air rushes to the sides, allowing you to bottom out against the hard ground. Demand a Dual-Chamber system: a high-pressure lower safety deck that is sealed tight, and a softer, vented upper deceleration chamber that absorbs the impact.
2. Top Sheet Material and Tension
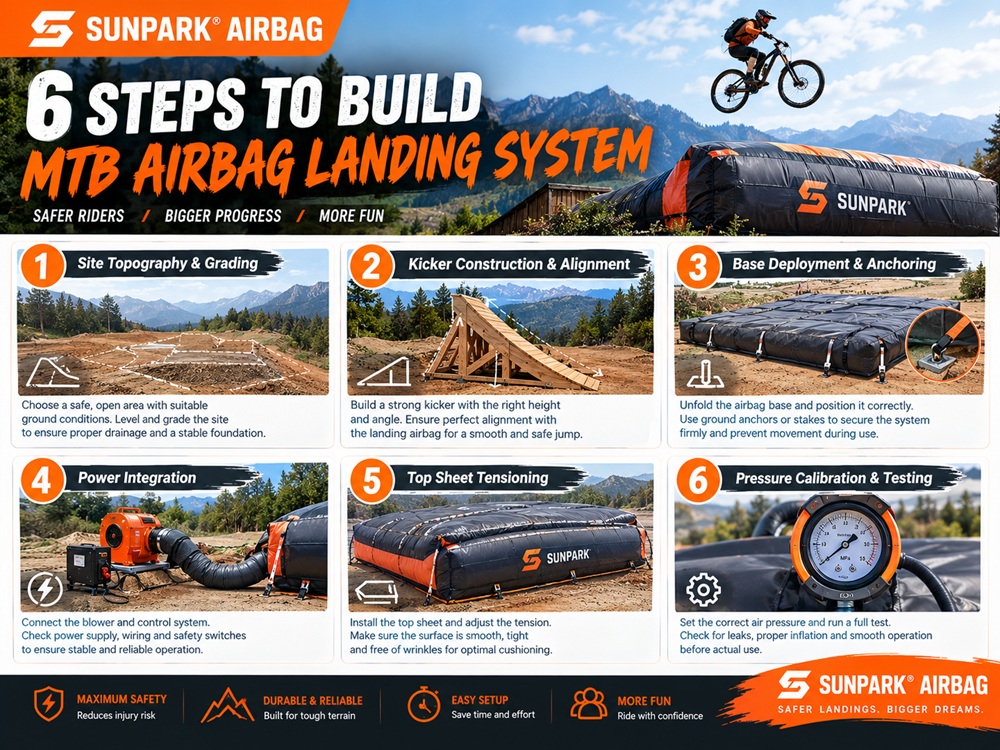
The top sheet must be manufactured from 0.9mm (32 oz/sq.yd) heavy-duty PVC tarpaulin. Thin 0.55mm top sheets will stretch and tear under the friction of knobby mountain bike tires. Furthermore, check the anchor bungees around the perimeter of the bag; the top sheet must be pulled taut and flat, with no loose wrinkles that could catch a tire knob and cause a crash.
3. Proper Ramp-to-Bag Geometry
The trajectory of the wooden kicker ramp must perfectly intersect the “sweet spot” of the airbag’s downslope. If the ramp is too steep, it will launch riders too high, causing them to land flat on the upper deck instead of the sloped transition. A reputable facility mathematically matches the kicker radius to the bag placement.
4. Blower Redundancy and Power Supply
For large commercial systems, ensure the airbag is powered by multiple industrial blowers. If the facility only uses one blower and it experiences a mechanical failure, the bag deflates rapidly. Multi-blower systems ensure that if one unit trips a breaker, the remaining blowers maintain safe pressure until the jump lane is closed.
Expert Verdict: The Progression Roadmap
From our experience engineering inflatable landing systems for global action sports facilities, our verdict is absolute: training on a modern, sloped transition airbag is the single fastest, safest, and most effective way to progress your mountain biking skills, provided you respect the physics of the landing. Airbags eliminate the catastrophic consequences of failure, but they do not eliminate the necessity of flawless technique.
Here is your clear, actionable progression roadmap:
- Master the Fundamentals on Small Dirt: Do not approach an airbag until you can confidently clear a standard 6-foot dirt tabletop with active lip pop and level flight.
- Ditch the Clips and Drop the Seat: Install flat pedals, wear grippy skate-style shoes, and slam your saddle down to the frame to ensure you can separate from the bike instantly in an emergency.
- Start Small and Dial the Speed: Perform mandatory speed checks alongside the ramp. Your first five jumps on the airbag should be simple, straight airs focusing exclusively on matching your tires to the sloped transition for a clean ride-out.
- Partner with Sunparkairbag: For facility owners looking to build a world-class training zone, bypass unverified generic inflatables. Partnering directly with Sunparkairbag gives your park access to commercial-grade 0.9mm PVC construction, dual-chamber safety decks, and custom-tailored ramp geometry, ensuring your riders progress safely, your throughput triples, and your maintenance costs drop to zero.
Frequently Asked Questions
The most critical MTB airbag landing techniques include keeping your wheels level or slightly rear-heavy on transition bags, actively pumping the lip instead of dead-sailing, knowing how to push the bike away laterally during a crash bail, and evacuating the landing zone immediately upon touchdown to prevent collisions.
Yes, if the facility utilizes a sloped, transition-style airbag. These systems feature a taut, 0.9mm PVC top sheet over a pneumatic chamber. If you land with your wheels aligned to the slope, you can ride down the transition and roll off the end seamlessly, precisely mimicking a dirt landing.
No. Beginners should never use clipless (clip-in) pedals when training on an airbag. If a trick goes wrong, you must be able to instantly separate your body from the 30-pound bicycle to avoid landing on top of the frame. Always use flat pedals and appropriate skate-style riding shoes for airbag progression.
A foam pit requires you to sink deep into loose polyurethane cubes, which often results in the bike getting tangled with the rider and creates a severe choking hazard from foam dust. An airbag provides pneumatic deceleration on a taut surface, allowing the rider to roll off or ride away in under five seconds without sinking.
Authoritative References & Action Sports Safety Standards
- ASTM International: Standard Practice for Inflatable Amusement Devices and Action Sports Training Infrastructure (ASTM F2374)
- Union Cycliste Internationale (UCI): Safety Guidelines for BMX Freestyle and Mountain Bike Slopestyle Progression Facilities
- U.S. Consumer Product Safety Commission (CPSC): Amusement Ride Safety Bulletin and Commercial Foam Pit Hazards