Quick Answer: How to Make a DIY MTB Jump That Launches Predictably
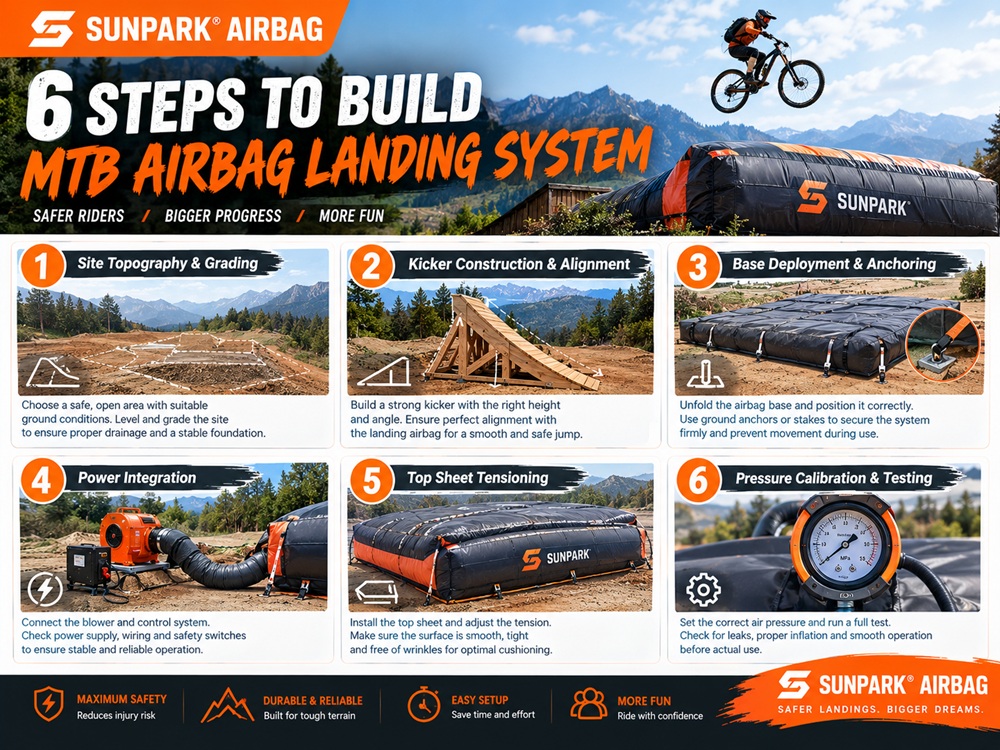
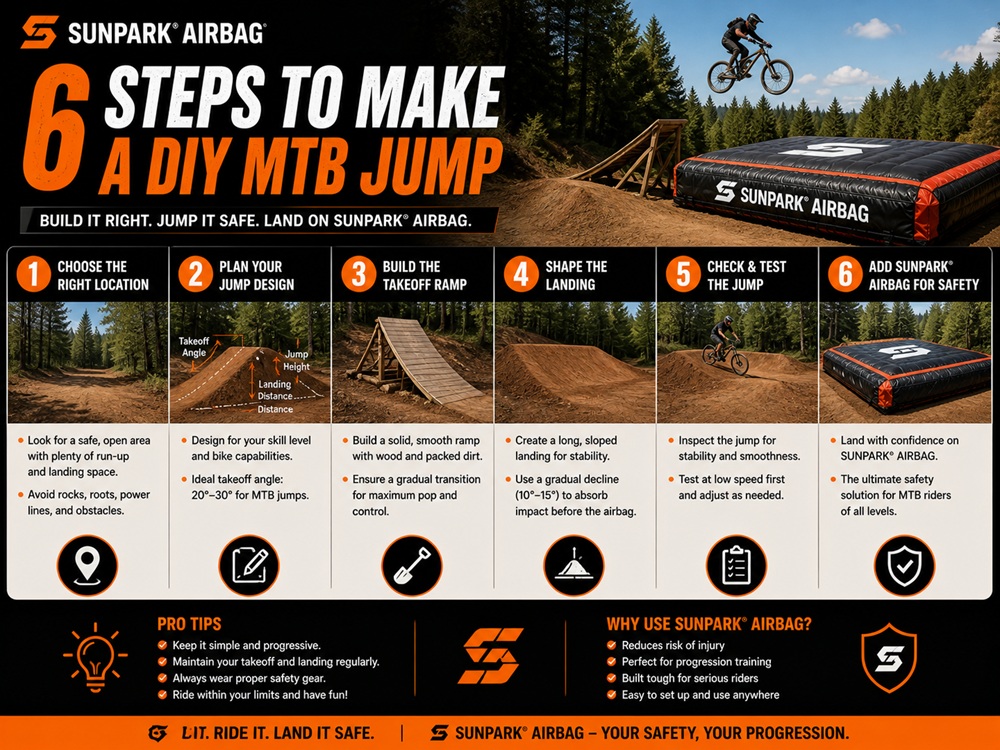
To safely make a DIY MTB jump, follow six disciplined steps: (1) Calculate your geometry by matching your bike wheelbase to a 10-to-12-foot transition radius and a 35-to-45-degree takeoff angle; (2) Plot the curve on 3/4-inch CDX plywood using the string-line radius method; (3) Cut transition stringers and lock them together with doubled 2×4 framing studs spaced no more than 8 inches apart; (4) Sheathe the face using two layers of laminated 3/8-inch exterior plywood and a steel entry plate; (5) Engineer the landing zone to match your launch trajectory; and (6) Integrate impact safety, replacing dangerous wooden flat-drops or hard dirt casings with a dedicated bike airbag landing to eliminate fear during trial runs.
The Physics of Jump Geometry: Radius, Lip, and Wheelbase
When you hit a jump on a mountain bike, the machine does not behave like a rigid skateboard. A modern enduro or downhill rig carries between 150mm and 200mm of front and rear suspension, rolling on large 29-inch or 27.5-inch wheels across an axle-to-axle wheelbase spanning 47 to 51 inches (1,200mm to 1,300mm). If your ramp surface curves too quickly over a short distance, your suspension absorbs the compression unevenly.
The transition is a segment of a true geometric circle. If you choose a radius that is too tight (under 8 feet / 2.4 meters), the front fork compresses while the rear wheel is still on flat ground. As the front wheel reaches the lip, the fork rebounds upward just as the rear shock enters peak compression. The result is the dreaded buck: the rear shock releases its stored spring energy right at takeoff, pitching your hips forward and throwing you headfirst over the bars.
From our experience on progression courses, a safe, predictable launch requires an arc radius between 10 and 13 feet (3.0 to 4.0 meters). This allows the entire wheelbase of a modern mountain bike to sit evenly inside the transition arc. The bike loads symmetrically, launches level, and gives you time in the air to spot your landing without fighting mid-flight rotational instability.
Quick Summary: The 6 Construction Steps at a Glance
| Step # | Construction Phase | Key Engineering Metric | Operational Failure Prevented | Build Recommendation |
|---|---|---|---|---|
| Step 1 | Geometry & Radius Planning | 10.5 ft radius; 35° to 45° lip angle | Endo bucking, harsh G-out compression | Never build under a 9-foot radius for full-suspension bikes |
| Step 2 | String-Line Curve Scribing | Exact circular arc on 3/4-inch CDX | Lumpy transitions, sudden flat spots | Use non-stretch braided wire or steel tape for scribing |
| Step 3 | Frame Cutting & Cross-Bracing | 2×4 studs on 6-to-8-inch centers | Deck sag, structural lateral collapse | Double up top and bottom landing rungs; use structural screws |
| Step 4 | Decking & Entry Transition | Two 3/8-inch laminated sheets + steel plate | Tire hang-ups at ground entry, cracked wood | Laminate thin flexible sheets; never force single 3/4-inch ply |
| Step 5 | Landing Alignment & Sweet Spot | Landing angle within 2° of flight vector | Broken ankles, bottom-out chassis trauma | Match landing slope directly to your launch trajectory |
| Step 6 | Testing & Impact Cushioning | Dynamic progression integration | Severe fractures, concussions during trial tricks | Pair with an inflatable bag before attempting hard ground hits |
The 6 Steps to Make a DIY MTB Jump Analyzed
Step 1: Calculate Your Geometry, Transition Radius, and Lip Angle
Before buying your first board, you need clear target dimensions on paper. For a versatile backyard kicker that launches riders 10 to 18 feet in distance, the standard dimensions are: 3.5 to 4 feet in height, 3 feet in deck width, and a base length between 5.5 and 6.5 feet.
In most professional situations, we recommend a lip angle between 38 and 42 degrees. A 30-degree lip sends the bike low and fast, which is fine for high-speed gap jumps, but offers very little airtime to practice maneuvers. A 50-degree lip launches you almost straight up, which can cause dead-sail stalls if you lack pump-track bike control. Set your radius string at 10.5 feet (126 inches) to give your suspension enough room to compress smoothly without bucking your rear wheel.
Step 2: Plot the Curve Using the String-Line Radius Method
Do not try to draw the curve freehand with a bent piece of PVC pipe. Freehand curves create parabolic irregularities that feel lumpy and unpredictable under high tire pressure. A predictable kicker requires a clean, circular arc.
Lay a 4×8 sheet of 3/4-inch CDX exterior plywood flat on a level driveway or garage floor. Measure along the bottom 8-foot edge to mark your ramp base length (e.g., 6 feet), and measure up the 4-foot edge to mark your desired lip height (e.g., 3.5 feet). Drive a pivot screw into the floor exactly 10.5 feet away from your intended curve origin. Attach a non-stretch steel cable or steel measuring tape to the screw, clamp a pencil at the 10.5-foot mark, and swing the pencil across the face of the plywood. The resulting arc creates a smooth, consistent launch transition. Cut along this line using a sharp jigsaw to create your master template.
Step 3: Cut the Transition Ribs and Frame with 2×4 Cross-Braces
Trace your cut master template onto a second 3/4-inch plywood sheet to create matching left and right side walls. For a 3-foot-wide kicker, cut a third middle rib from leftover plywood. This center rib prevents the riding surface from flexing when a 200-pound rider lands heavily on the deck.
Frame the transition using straight construction-grade 2×4 studs cut to 34.5 inches in length. Space these cross-braces no more than 6 to 8 inches apart along the curved perimeter, turning each 2×4 on edge so the 3.5-inch face resists the downward impact load of your tires. Secure every cross-brace with two 3-inch exterior structural wood screws on each side. Never use standard drywall screws; drywall screws are brittle and will shear under repetitive dynamic loads. Cross-brace the rear vertical legs with diagonal 2×4 sway braces to keep the ramp square and stable.
Step 4: Skin the Face with Flexible Plywood and a Steel Entry Plate
Trying to bend a single sheet of 3/4-inch plywood around a 10-foot radius will split the wood or pull your frame screws right out of the studs. In our testing, the cleanest method is laminating two layers of 3/8-inch exterior-grade sheathing.
Start with the first 3/8-inch sheet at the top of the ramp and bend it down toward the base, fastening it into every 2×4 rung with 1-5/8-inch deck screws spaced every 6 inches. Lay your second 3/8-inch sheet directly over the first, offsetting the seams so joints do not overlap. Coat the surfaces with waterproof wood glue between layers for extra rigidity. Finally, screw an 1/8-inch thick galvanized steel or diamond-plate aluminum threshold plate to the bottom entry. This metal transition eliminates the lip bump between ground and wood, ensuring a smooth, catch-free entry for your front tire.
Step 5: Engineer and Align the Landing Zone
A launch ramp is only half the equation; the landing determines whether you roll away cleanly or head to the emergency room. When you launch off a 40-degree wooden kicker, your flight trajectory arcs downward at roughly 25 to 35 degrees. Landing flat on hard dirt or grass transfers massive deceleration forces straight into your knees, wrists, and bottom bracket.
If you build a dirt landing, shape the receiving slope at least two feet higher than your takeoff lip, rake the transition smooth, and pack the soil firm with a plate compactor. Build the landing deck twice as wide as your kicker to give yourself room for off-axis corrections. Never build a blind wooden gap without a safety knuckle; if you come up short, casing a hollow wooden lip can bend wheels and throw you into a violent stop.
Step 6: Test, Fine-Tune the Takeoff, and Integrate Impact Protection
Before hitting your new jump at full speed, do a roll-in test. Push your bike up the face slowly to confirm your chainring, rear derailleur cage, and pedals clear the entry plate and frame rungs with room to spare. Take your first test hit at moderate speed, popping gently off the lip to feel how your suspension responds to the transition.
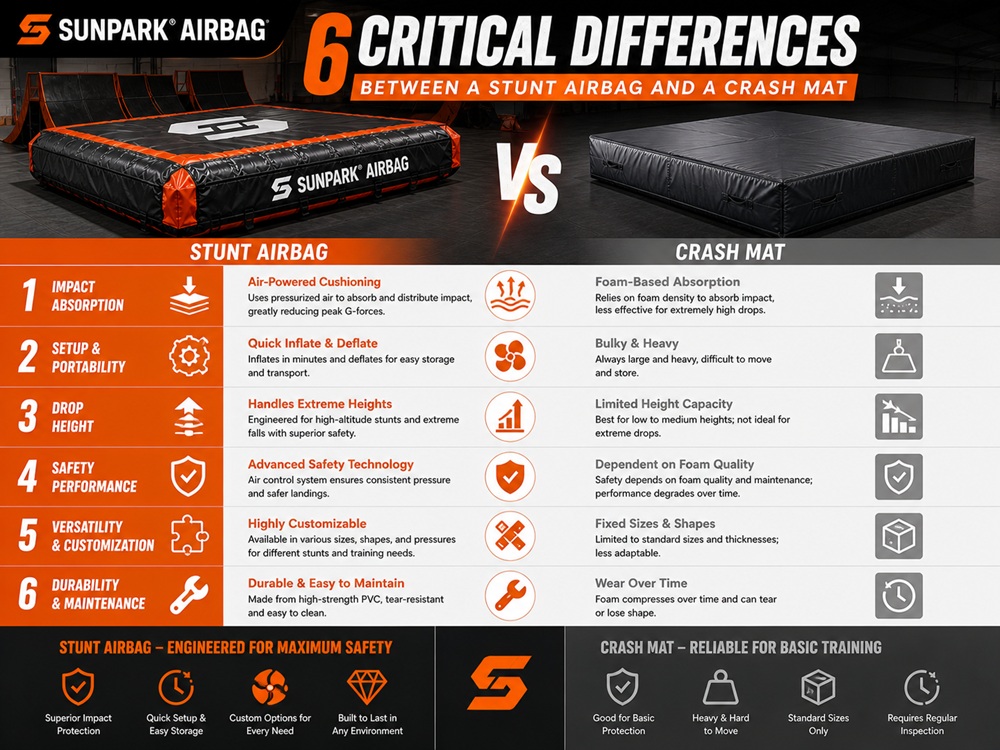
If you plan to use this kicker to learn new tricks like tailwhips, 360s, or backflips, hitting a hard dirt or wooden landing on your first attempt carries unnecessary risk. Look at how training facilities approach early progression: pairing your launch ramp with an inflatable crash mat or a dedicated stunt airbag landing gives you the confidence to commit to rotations without worrying about hard ground impacts.
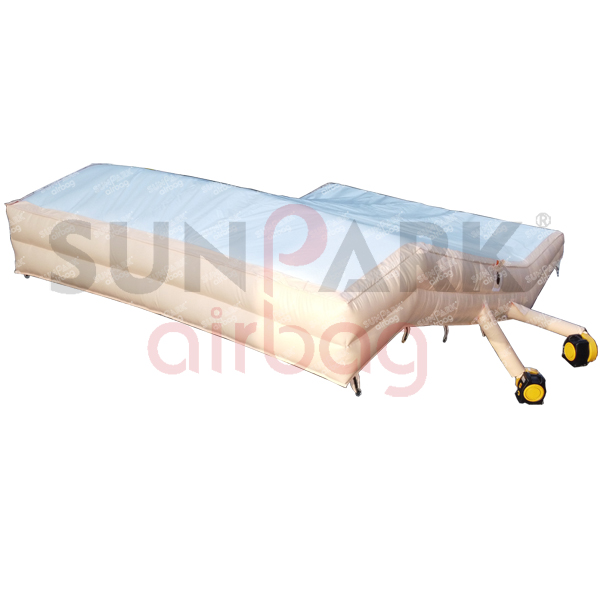
Backyard Progression Standard: Sunparkairbag MTB Jump Airbag Landing
Building your own launch ramp is rewarding, but taking hard falls on packed dirt landings quickly stalls your riding progression. Sunparkairbag engineers industrial pneumatic landing solutions that let riders hit new tricks with genuine confidence.
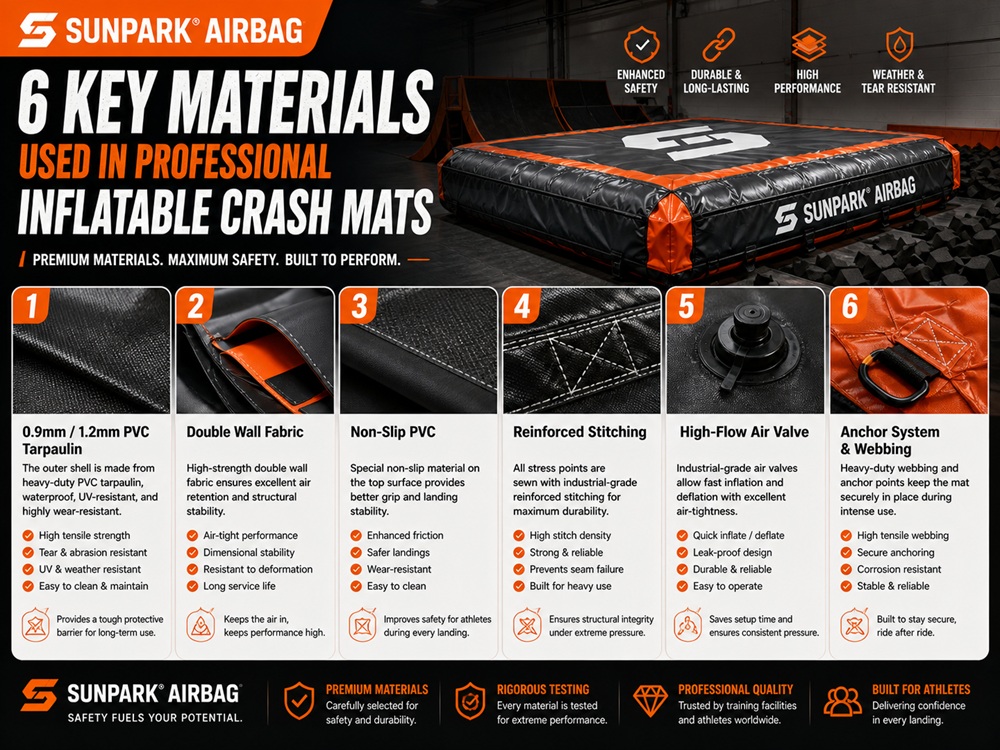
| Base Airbag Construction | Heavy-duty 0.55mm PVC Tarpaulin core; waterproof, flame-retardant, UV-stabilized |
| Protective Top Sheet | Ultra-tough 0.9mm PVC Tarpaulin wear sheet; lead- and phthalate-free |
| Custom Dimensions | Fully customizable footprint, height, and landing incline angles |
| Included Accessories | Continuous-flow commercial electric blower, industrial repair kit, storage bag |
| Build Provenance | Crafted by technical specialists with 5+ years of high-tensile fabrication experience |
Rider Recommendation: Pair your wooden kicker with a sloped MTB Jump Airbag Landing to practice risky tricks, build air awareness, and land safely on a supportive cushion every session.
Direct Technical Comparison: Wooden Kicker vs. Dirt Tabletop vs. Airbag Setup
| Jump Setup Type | Build Time & Cost | Portability & Storage | Impact Safety Rating | Maintenance Overhead | Best Progression Role |
|---|---|---|---|---|---|
| DIY Wooden Kicker + Dirt Landing | 1 to 2 Days; $120 – $250 lumber | Moderate (Can be wheeled away) | Low (Hard dirt landing; zero fall forgiveness) | High (Rain warps wood; ruts erode landing) | Basic trail pop and small backyard jumping |
| All-Dirt Hand-Dug Tabletop | 3 to 7 Days; Free sweat equity | Fixed (Permanent trail position) | Moderate (Knuckle reduces gap fall risk) | Very High (Requires constant watering and packing) | Traditional trail riding and flow track lines |
| DIY Kicker + Sunparkairbag Landing | 1 Day Kicker + 15 min Airbag inflate | High (Airbag deflates into a trunk bag) | Maximum (Dynamic deceleration absorption) | Minimal (Washable heavy-duty PVC tarpaulin) | Learning 360s, flips, whips, and risky new tricks |
| Manufactured Folding Metal Ramp | Instant out of box; $400 – $900 | Extreme (Folds into a backpack/trunk) | Dependent on landing surface chosen | Low (Powder-coated rust resistance) | Street sessions and pop-up parking lot sessions |
Pros and Cons of Building a DIY Backyard MTB Jump
| Build Approach | Operational & Practical Pros | Real-World Risks & Cons |
|---|---|---|
| Building a DIY Wooden Kicker (Home Workshop Project) |
|
|
| Shaping a Natural Dirt Kicker (Shovel & Dirt Pack) |
|
|
Who Should Build a DIY Jump (And Who Should Avoid It)
Investing time and lumber into a ramp build only makes sense if you have the space, the tools, and a sensible progression plan. Consider whether a backyard build fits your current setup:
Who Should Build a DIY Wooden Kicker:
- Riders with Flat Yard Space and Approach Speed: If you have at least 60 to 80 feet of smooth run-in (or a slight downslope) and a clear, obstacle-free landing zone, building a wooden kicker gives you a convenient practice setup right at home.
- BMX and Freestyle Mountain Bikers: Riders practicing clean takeoffs, bunny-hop pops, and air maneuvers benefit from the rock-solid, non-eroding lip that a well-built wooden ramp provides over dirt lips.
- Action Sports Facilities & Clubs: Local clubs looking to add modular, movable features to existing skills parks without hiring excavators can use wooden kickers to create flexible progression lines.
Who Should NOT Build One (And What to Do Instead):
- Riders Without Proper Tools or Basic Carpentry Skills: If you lack a jigsaw, a circular saw, and experience driving structural screws, a poorly built ramp can fail under your tires. A pre-engineered commercial ramp is a far safer option.
- Riders in Crowded Yards with Zero Landing Room: Launching off a 4-foot kicker with only 10 feet of flat grass before hitting a fence or concrete patio is an accident waiting to happen. Before building, review our airbag jump locations guide to find a dedicated public progression park with safe runouts.
- Beginners Who Cannot Consistently Level-Hop: If you cannot reliably level-hop off small curbs or pump through dirt rollers, hitting a 40-degree wooden kicker will feel overwhelming. Build your fundamentals on small dirt roll-ins before building a full-sized ramp.
Common Construction and Riding Mistakes That Lead to Crashes
Builder Warning: The most catastrophic mistake backyard builders make is building a jump with a flat, straight incline rather than a curved transition arc. Hitting a flat wedge ramp on a bicycle acts like a wall, jamming your front fork and stalling your forward momentum.
- Using Brittle Drywall Screws: Drywall screws are designed to hold sheetrock against studs under zero dynamic load. Hitting a ramp on a 35-pound bike generates heavy shear forces that snap drywall screw heads clean off, causing the frame to collapse under load. Always use 3-inch exterior structural wood screws.
- Failing to Seal the Plywood Against Rain: Unsealed exterior plywood delaminates after just a few heavy rainstorms. The wet veneer bubbles, rots, and creates soft spots that can swallow a front wheel. Coat your finished ramp with outdoor deck stain, oil-based exterior paint, or marine spar urethane, and mix fine silica sand into the paint on the riding deck to keep it grippy when wet.
- Building a Narrow 24-Inch Riding Deck: A 2-foot-wide ramp looks wide on paper, but when you approach it at 15 mph, that narrow track leaves zero margin for slight steering corrections. Build your kicker at least 36 to 48 inches wide so you can take off confidently without worrying about your tires slipping off the edge.
- Leaving the Rear Shock on Ultra-Fast Rebound: When taking off from steep transitions, a fast rear rebound setting acts like an ejector seat. Slow down your shock’s low-speed rebound damping by two or three clicks to keep the rear wheel calm as it leaves the lip. Review our guide on common BMX injuries and prevention to see how dialed bike setup prevents common over-the-bars crashes.
Sourcing Lumber, Hardware, and Safety Equipment
Before heading to the lumber yard, use this practical hardware checklist to ensure you buy durable materials that withstand outdoor weather and hard use:
1. Structural Lumber & Plywood Selection
Never buy cheap interior-grade OSB (oriented strand board) or particle board. OSB turns into mush the first time it gets wet. Insist on 3/4-inch CDX pressure-treated or exterior-grade fir plywood for your structural side ribs, and 3/8-inch BCX sanded exterior plywood for your curved deck skin. Select kiln-dried 2×4 framing lumber that is straight and free of large structural knots.
2. Fasteners & Transition Plating
Pick up a 5-pound box of #9 or #10 gauge 3-inch coated exterior star-drive (Torx) framing screws, along with a 2-pound box of 1-5/8-inch exterior deck screws for securing the skin. Visit a local metal supply shop to pick up an 1/8-inch by 6-inch by 36-inch strip of cold-rolled steel or aluminum diamond plate to build a smooth, rattle-free ground transition plate.
3. Transitioning from Hard Landings to Airbag Cushions
If you want to move beyond basic straight jumps and start practicing airborne maneuvers, building a hard dirt landing is often the most time-consuming part of the project. A sloped big jump airbag system or specialized BMX airbag landing sets up in minutes and gives you a supportive, repeatable cushion to practice on. Take a look at our guide on cheap MTB airbag options to find a setup that fits your backyard space and progression goals.
Frequently Asked Questions
For beginners and intermediate riders on modern 27.5-inch or 29-inch mountain bikes, a transition radius between 10 and 12 feet (3.0 to 3.6 meters) is optimal. Radii tighter than 8 feet buck the rear wheel on full-suspension bikes, while radii flatter than 15 feet require excessive approach speed to achieve clean airtime.
Bucking occurs when the ramp curve is shorter than the bicycle wheelbase, or when the lip curvature tightens abruptly near the exit. The rear shock compresses as it enters the transition and rebounds aggressively just as the rear wheel leaves the lip, pitching the rider forward into an uncontrolled endo.
An airbag landing is exponentially safer. Dirt landings offer zero dynamic impact attenuation during casing or over-rotation, causing severe joint, collarbone, and spinal trauma. Inflatable MTB airbags provide progressive deceleration that absorbs severe crashes and lets riders roll away unharmed.
We recommend laminating two layers of 3/8-inch (9mm) exterior-grade plywood or flexible structural sheathing rather than trying to bend a single 3/4-inch sheet. Two thinner layers bend smoothly around the radius without snapping and create a rigid, durable curved deck when glued and screwed together.
Authoritative References & Action Sports Standards
- International Mountain Bicycling Association (IMBA): Trail Solutions Guide to Jump and Flow Trail Construction
- ASTM International: ASTM F1292 Standard Specification for Impact Attenuation of Surfacing Materials
- Union Cycliste Internationale (UCI): Safety Protocols and Ramp Dimensions in Freestyle Park Operations